Installing Jupyter notebooks on a Centos 7 server Tweet
The server
The place that I work recently has just launched a pilot Infrastructure As A Service, uh-iaas, which is based on openstack.
To try this out I wanted to setup an instance of Jupyter notebook.
I will not document the server setup, but I used a plain Centos 7 images from the provided GOLDEN images in the iaas. This will work on pretty much any standard Centos 7 installation.
The packages
This is the packages we are going to need. epel-release is needed for certbot, and bzip2 is needed by the anaconda installer we are going to download later.
# yum update
# yum install epel-release
# yum install bzip2
# yum install certbot
Read more about EPEL here: https://fedoraproject.org/wiki/EPEL
Jupyter stuff
We need a non-root user, this is good practice.
# useradd jupyter
For this guide we also grant the user jupyter full sudo without password. You should consider if you want to do this or not.
# echo 'jupyter ALL = (ALL) NOPASSWD: ALL' > /etc/sudoers.d/20-jupyter
Letsencrypt and certbot
We are going to enable passwordbased authentication on our Jupyter notebook installation. To protect the password from preying eyes we need to encrypt our traffic.
SSL certificates are provided to you for free, and with automatic renewal, by the great letsencrypt project.
# certbot certonly --standalone -d redbook.yourdomain.no -d www.redbook.yourdomain.no
# certbot renew --dry-run
You now have a valid certificate, and you have tested that it is renewable. Lets add it to our crontab.
# crontab -e
Put the following line into the crontab config and save it.
* 5,11 * * * certbot renew --quiet
Read more about certbot here: https://certbot.eff.org/#centosrhel7-other
Read more about letsencrypt here: https://letsencrypt.org/how-it-works/
Read more about crontab here: https://help.ubuntu.com/community/CronHowto
The Jupyter configuration
… now its time to switch to the jupyter user
# su jupyter
… this notebook folder will be the home for everything that you create in the notebook
$ mkdir ~/notebooks
… download the anaconda installer, install anaconda and generate a default config file
$ curl -o anaconda.sh https://repo.continuum.io/archive/Anaconda3-4.2.0-Linux-x86_64.sh
$ bash anaconda.sh
$ jupyter notebook --generate-config
Now we need to generate the login password for our Jupyter notebook installation.
$ python
… enter the following code in the python shell
import notebook.auth.security as ne
ne.passwd()
Enter password:
Verify password:
Out[2]: 'sha1:67c9e60bb8b6:9ffede0825894254b2e042ea597d771089e11aed'
Exit the python shell and open the Jupyter notebook configuration file.
$ vi ~/.jupyter/jupyter_notebook_config.py
… find the following setting and insert your generated sha1 value like shown below. Remember to uncomment the c.NotebookApp.password setting too.
c.NotebookApp.password = 'sha1:67c9e60bb8b6:9ffede0825894254b2e042ea597d771089e11aed'
And here is some more configuration that might be a good starter.
# Set options for certfile and keyfile
c.NotebookApp.certfile = u'/etc/letsencrypt/live/redbook.domain.no/fullchain.pem'
c.NotebookApp.keyfile = u'/etc/letsencrypt/live/redbook.domain.no/privkey.pem'

# Set ip to '*' to bind on all interfaces (ips) for the public server
c.NotebookApp.ip = '*'

# It is a good idea to set a known, fixed port for server access
c.NotebookApp.port = 8888

# The password that provide access to the notebook
c.NotebookApp.password = sha1:67c9e60bb8b6:9ffede0825894254b2e042ea597d771089e11aed

# It gives no meaning opening a browser on localhost when running from a server like ours
c.NotebookApp.open_browser = False

# Set the directory what we want to serve notebooks from
c.NotebookApp.notebook_dir = 'notebooks'
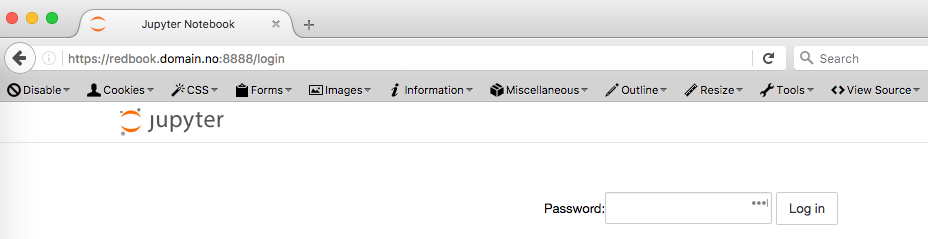
Start your server and start playing with your new Jupyter notebooks.
$ sudo ~/anaconda3/bin/jupyter notebook --config ~/.jupyter/jupyter_notebook_config.py
Point your webbrowser and login with the password you created in the python shell.
Comments